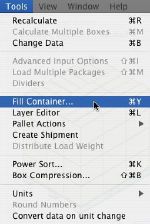
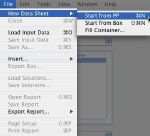
QUICK PALLET MAKER CONTAINER FILL EXAMPLES
Creating a Shipment With Finite Packages
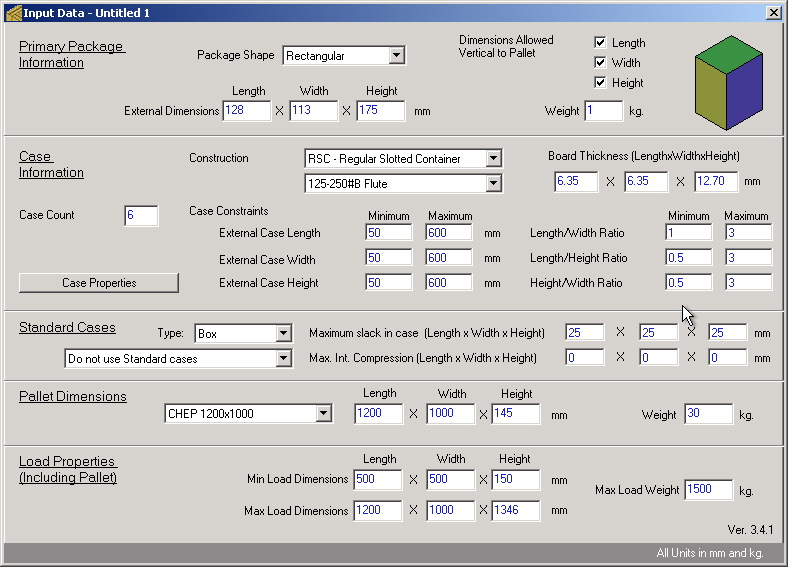
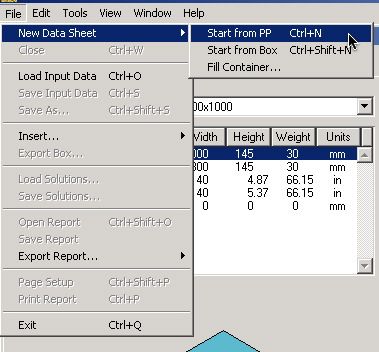
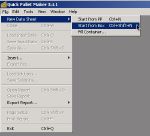
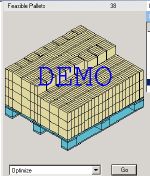
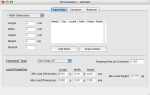
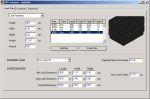
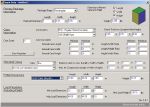
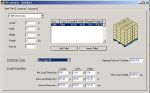
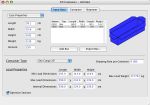
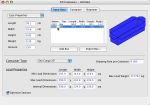
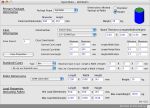
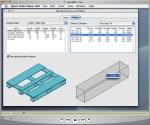
| This example explains how Quick Pallet Maker can be used to create a container load with a certain number of primary packages of known dimensions into standard cases, then into standard pallets and finally into a standard container. Nice that we use standards, isn't it? Ok, for starters, you will need to boot QPM and open a new window. In this case, we are working with Imperial (i.e. English) units because there are more standard cases available. We could have done the same thing with metric units but would have had to enter the box dimensions prior to opening a new document window. |
 |
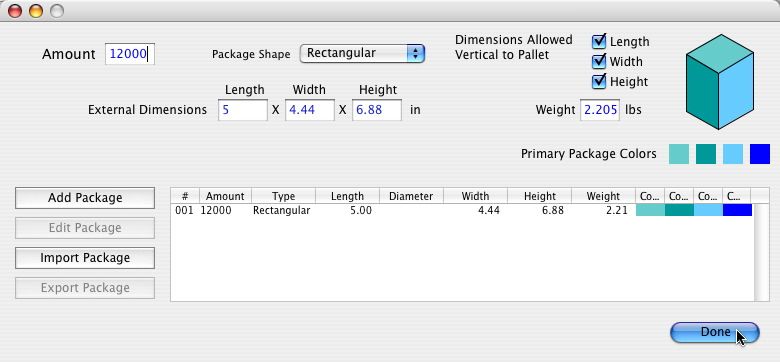
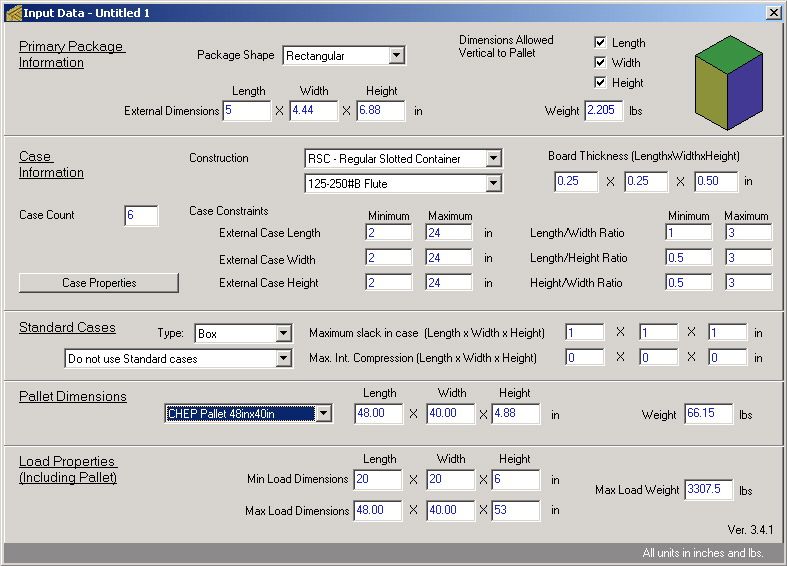
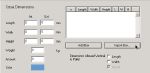
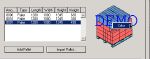
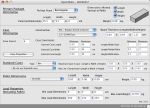
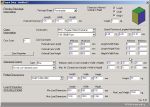
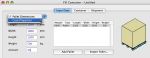
| The next step is to enter the dimensions of the primary package into a special window that can be used to enter multiple types of Primary Packages and where the user can enter the quantity that will be used in the shipment. For this example, we used the default dimensions and typed in a value of 12000 widgets to ship somewhere. |
 |
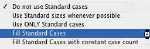
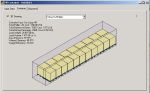
| After entering the primary package dimensions and closing the smaller window, the top of the input window will be grayed. For this example, we choose "Fill Standard Cases" to add as many packages as possible to the standard cases. |
 |
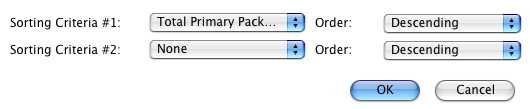
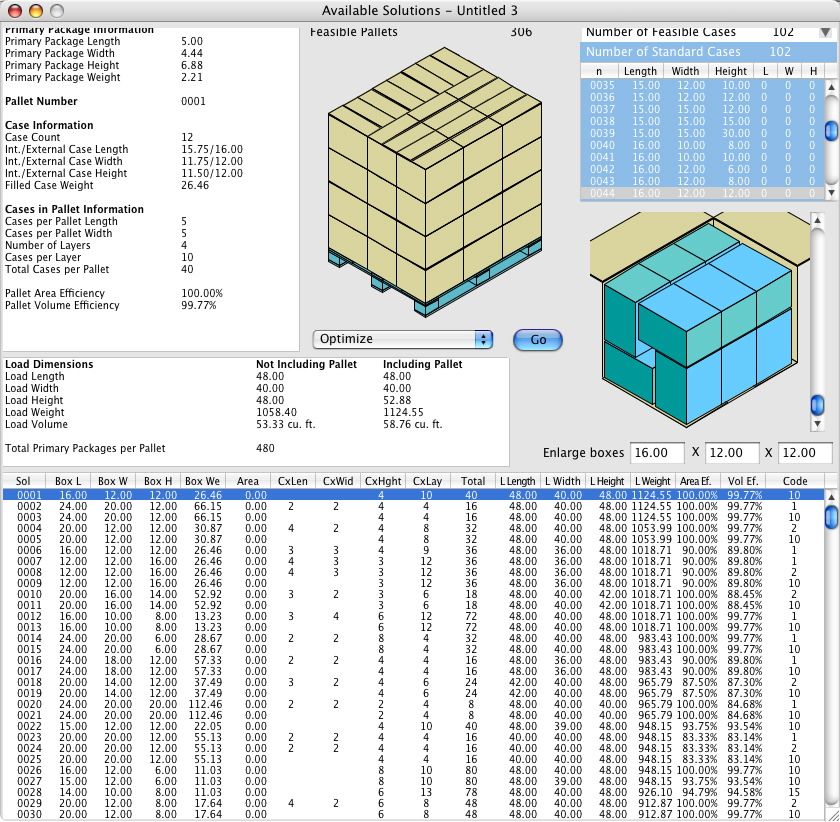
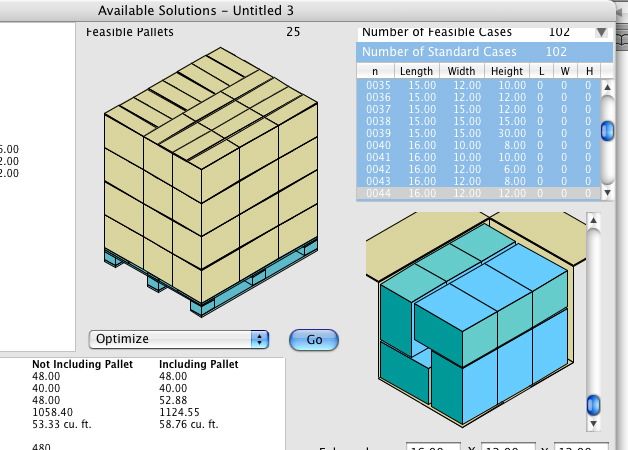
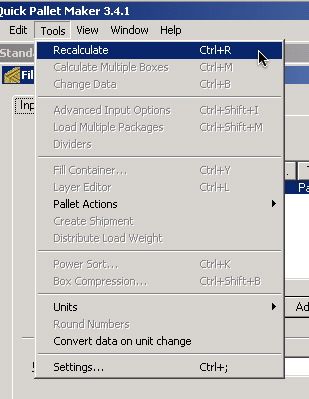
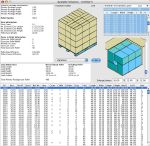
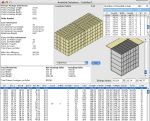
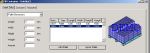
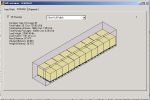
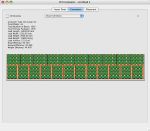
| After entering the final input settings, select "Recalculate" from the Tools menu to obtain a list of pallets. The first step is to sort this list by the number of primary packages per pallet in order to fit as many as possible in the shipment. |
 |
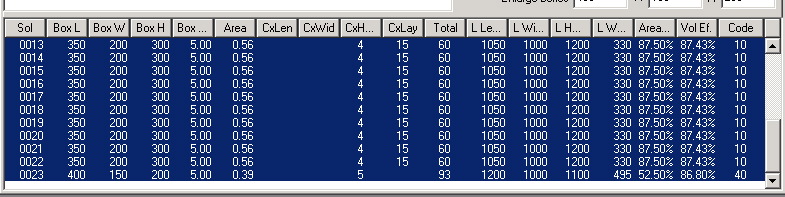
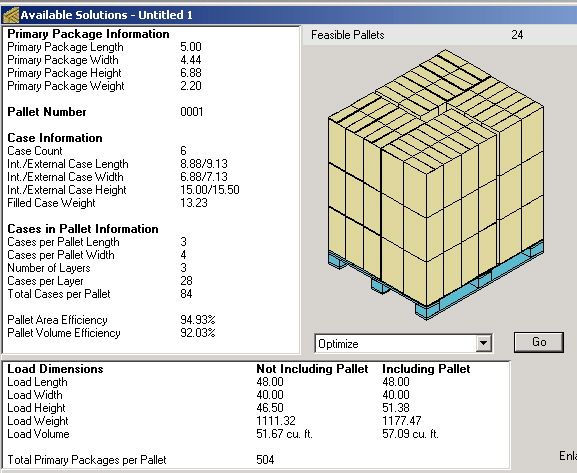
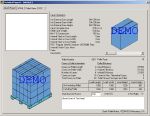
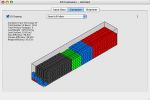
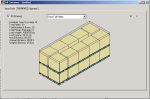
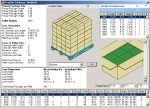
| When this has been done, the Results Window should look like the attachment, in which a very efficient pallet tops the list. |
 |
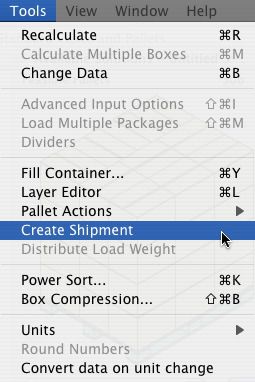
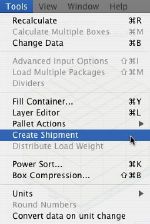
| Next, select "Create Shipment" from the Tools menu. This procedure will copy the selected pallet and use as many boxes as primary packages need to be shipped. |
 |
| A certain number of pallets have been created. The last pallet will contain only the amount of boxes that are needed to fulfill the shipment. |
 |
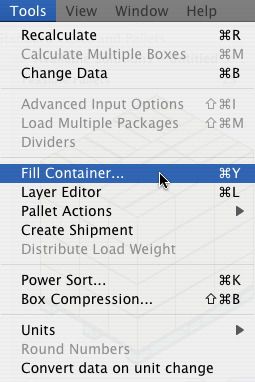
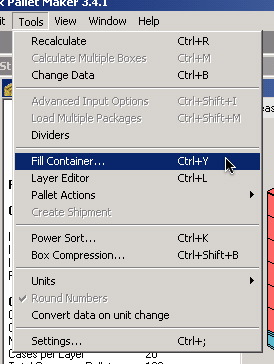
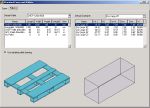
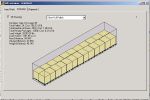
| Once the pallets from the shipment are ready, we will need to select them all and then the Container Fill feature that is available from the Tools menu. |
 |
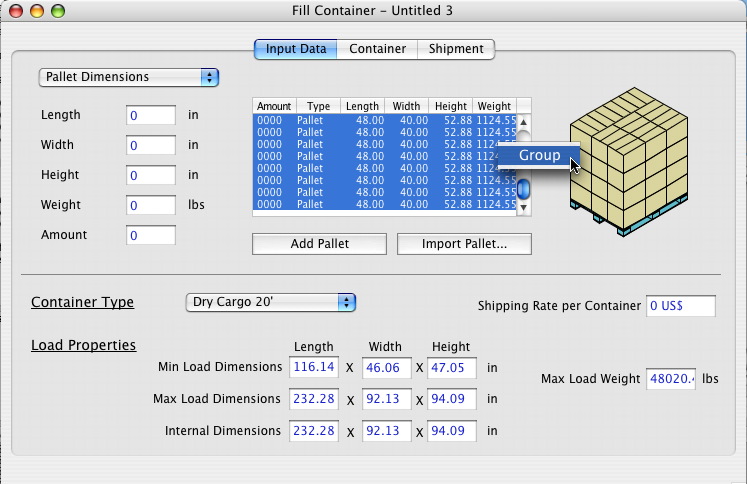
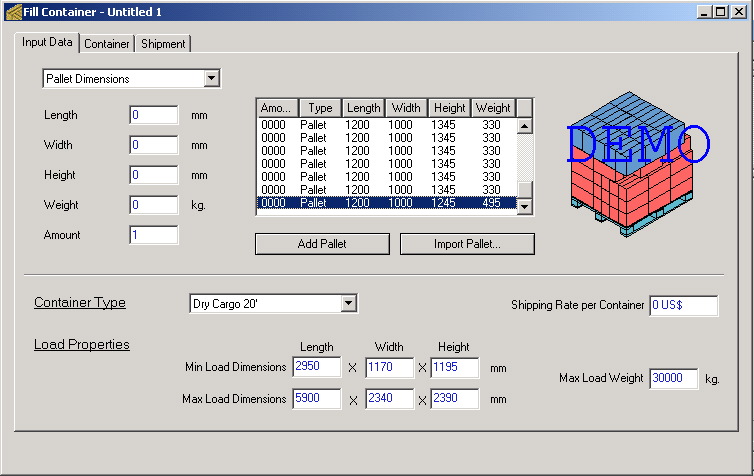
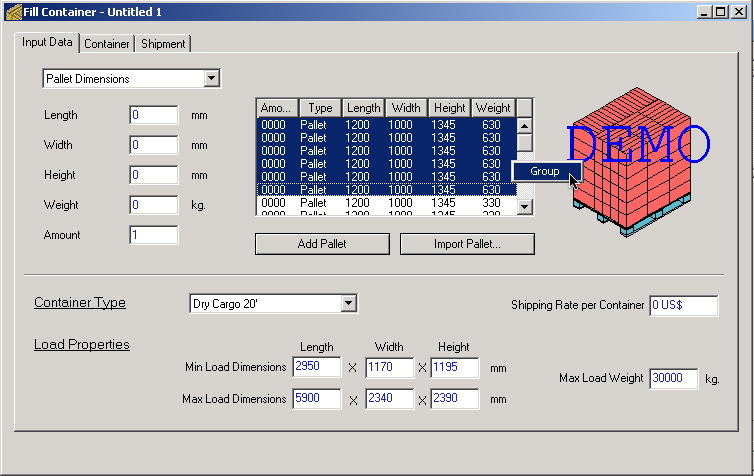
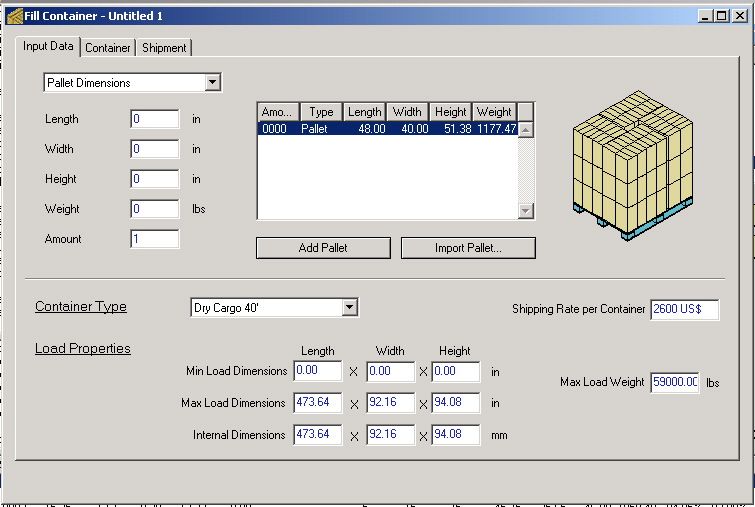
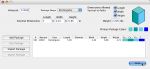
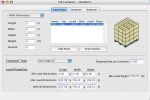
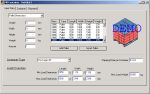
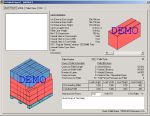
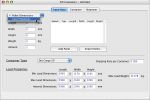
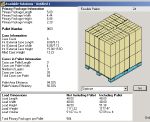
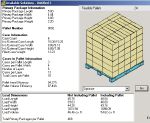
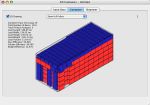
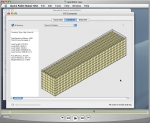
| The Container Fill window should look like in the attached window. From this window, the user can select the type of container and the internal dimensions and weight constraints in case they do not match the default values. In this example, we will select all the pallets from the table and group them by clicking on the table with the right mouse button (Windows) or using ctrl+click (Mac OS). We selected the last pallet because it was identical to the rest. |
 |
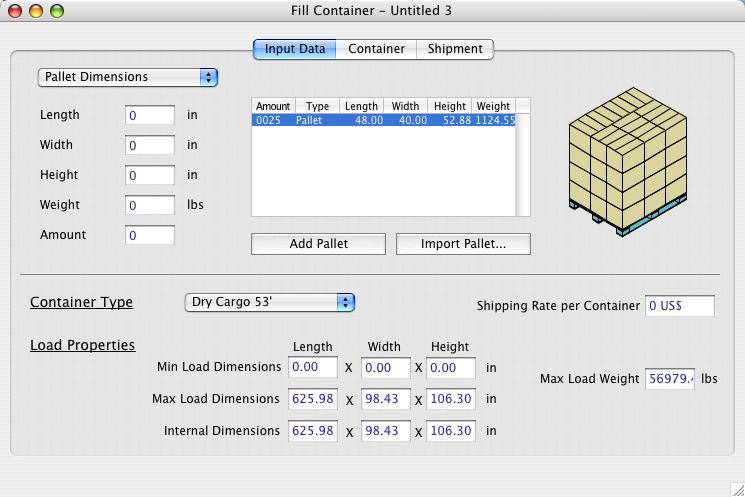
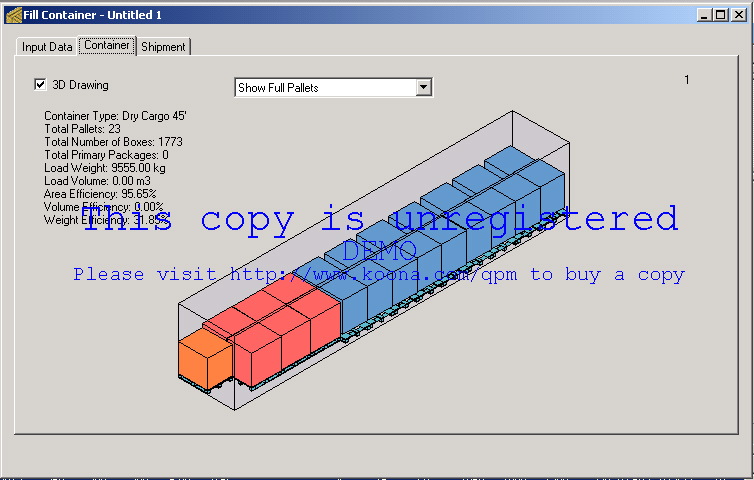
| Instead of having 25 pallets with an amount equal to zero, we will now have one pallet with an amount equal to 25. We set the container to the biggest available size (53 foot). |
 |
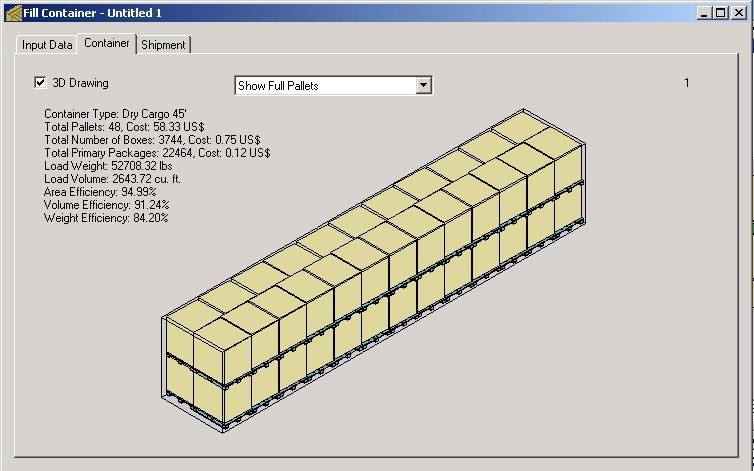
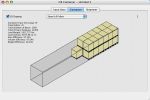
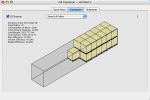
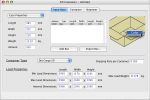
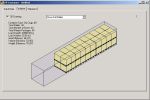
| To calculate a new container, all is needed is to press the second tab in the page. The drawing on the second tab will show a container that has been filled with full pallets and one incomplete pallet. |
 |
| Since the user has the possibility of using the a smaller container, he/she will note that it optimizes better the available space. This small report can be printed or copied onto a third-party application. |
 |
| Top |
|
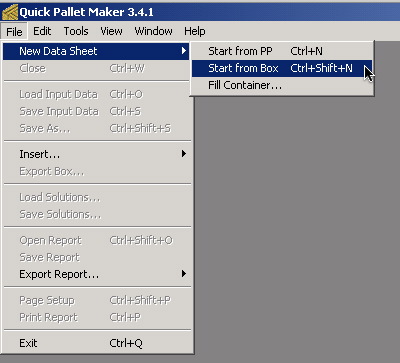
Filling Containers With Pallets Using Multiple Box Sizes
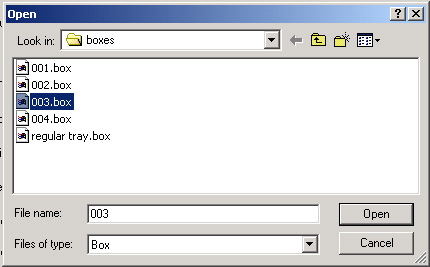
| The following example explains how to load a container with a given number of products separated in two different box types. To run this example, the box files for the example can be downloaded from the following links: Box003.box and Box004.box. |
|
| The first step is to run QPM and load a new window starting from box dimensions as in the screenshot at right. |
 |
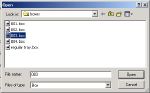
| Next, we click on the "Import Box..." button to open the box files that we have downloaded from the links above. |
 |
| The "Import Box" command allows you to select from any box file that you have saved with Quick Pallet Maker or created with a text editor or application that works with XML files. |
 |
| Once they are both open, the window should look like in the screenshot at right. Please note that the amounts have been increased from 8 to 800 and from 10 to 1000, respectively. |
 |
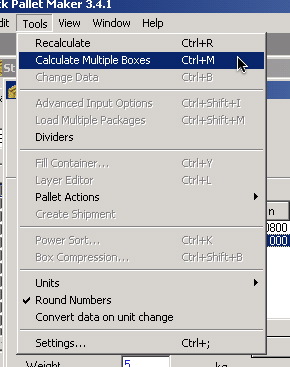
| If we use the default pallet and pallet constraints, the next step is to calculate multiple boxes using the command in the Tools menu. |
 |
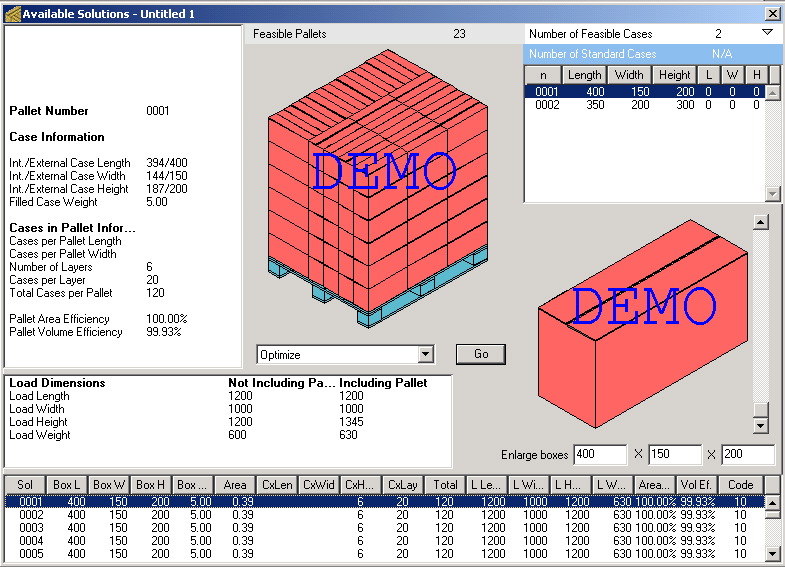
| Once the calculation is made, the resulting window should look like the image to the right. |
 |
| The next step is to select all the pallets in the list at the bottom of the window. This can be done by using the "Select All" command from the Edit menu. |
 |
| With all the pallets selected, use the "Fill Container..." command from the Tools menu as in the screenshot to the right. |
 |
| A new window will open and the central table will contain all of the pallets that were calculated previously. Selecting the last pallet in the list will show the one that combines the two different box types (see screenshot to the right). |
 |
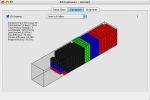
| To fill a container, we will need to simplify the list to include only the 3 pallet types. The first type contains only the red boxes, the second contains only blue boxes and the third type contains the mix of boxes. To do this, we select only the pallets with red boxes and click with the right button (ctrl+click on the Mac) and then use the "Group" command as in the screenshot to the right. |
 |
| When this is done with the red and the blue pallets, we will obtain 6 of the former and 16 of the latter. |
 |
| The next step before calculating is to change the amount of the mixed pallet from 0 to 1. This is done by double-clicking on the "Amount" cell and then editing the number (see screenshot). |
 |
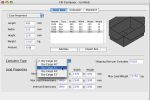
| Next, we select the container type. There's no reason for selecting the 45' container other than that it works best with this specific example as the load is well distributed and stable. |
 |
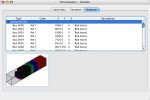
| After selecting the container, we choose "Recalculate" from the Tools menu or simply click on the "Container" tab. The full container will appear as in the screenshot to the right. |
 |
| There's a problem here, however: the last pallet looks too much like the other red ones and the container loaders may not be able to tell the difference. Therefore, we change the color of the pallet by right-clicking on the drawing (ctrl+click on a Mac) and calculate again. |
 |
| Now, after calculating again, we can tell the loaders that the orange pallet is different from the rest. |
 |
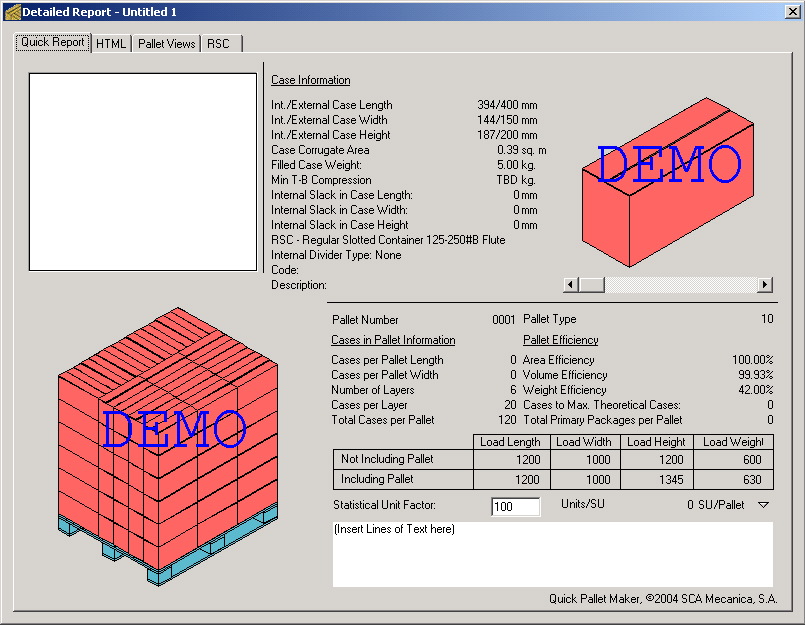
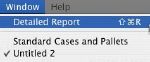
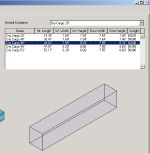
| To further explain the loading process, we need to create reports for each one of the pallets. Therefore, we close the container window (after printing or copying the container drawing) and choose "Detailed Report" from the Available Solutions window after selecting the first pallet. This report can also be printed. |
 |
| We select one of the blue pallets and do the same. |
 |
| And finally, we select the last pallet and display the output. Note that a palletization movie can be made so the loaders can view the exact box order in an easier fashion. |
 |
| Top |
|
Filling Containers With Boxes Without Knowing Case Count
| A customer approaches us on how he can reduce the shipping costs for products that he imports from India. He doesn't use pallets to load the boxes in order to save space and because the labor costs in the country of origin and in the destination country are quite low. He also didn't care about the case count as long as it would fit as many packs as possible into the container. The reason for this was that the packages would be sold in small amounts anyway in high-frequency stores. |
|
| This example requires that we use the "Start from Primary Package" window instead of using the "Fill Container" window to load a container with floor-loaded boxes. This is because we will be using the Advanced Input Options window. Hence, the first step is to load a new window starting from Primary Package dimensions. |
 |
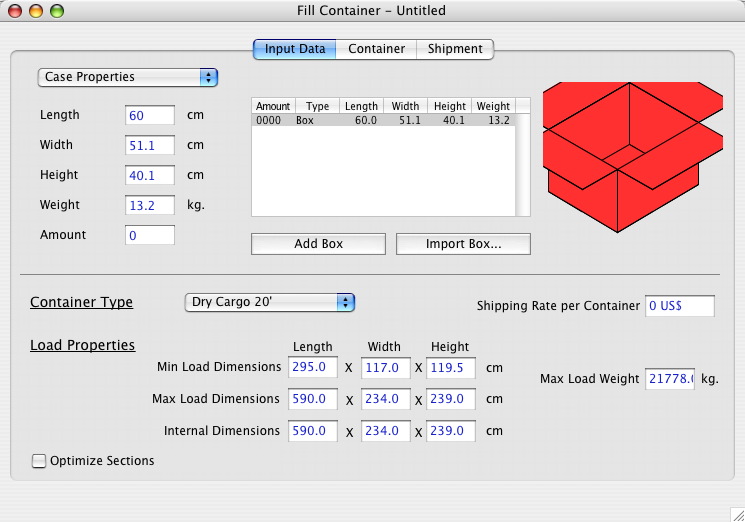
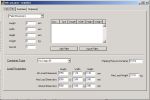
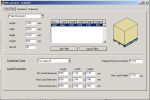
| Once the window appears, we will enter the primary dimensions, weight, case constraints and the limitations of the load. Since we will not use pallets, we enter zero for the pallet dimensions and the internal container dimensions as the maximum load dimensions. In this case, we copied the dimensions that are available from the Container list in the second tab of the Standard Cases and Pallets window. |
 |
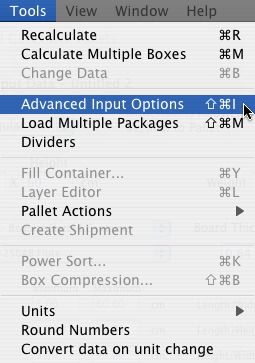
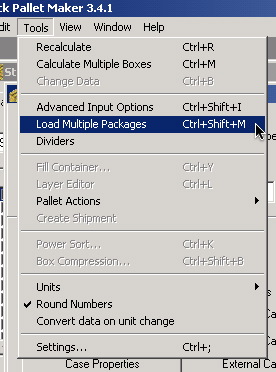
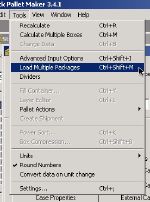
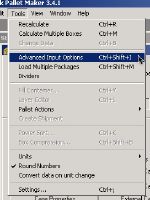
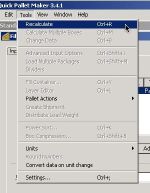
| After entering the input data in the appropriate window, we're ready to commence the calculations. Please note that in this case, we didn't enter the case count because we will be running different scenarios with varying case counts. To run these scenarios, we open the Advanced Input Options window from the Tools menu. |
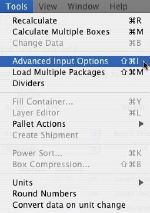 |
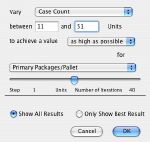
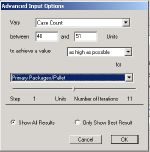
| From the Advanced Input Options window, we will select to vary the Case Count between 11 units per box (a smaller number is not practical because of the excessive shipped carton per pack) and 51 (we do not pick a larger count to not make the boxes too heavy). We pick "achieve a value as high as possible for Primary Packages per Pallet" because PP/Pallet is our best indication of filling efficiency. Since all the case counts are evaluated, there is no need to change the number of iterations. Finally, we pick to show all the results (in case we see another value we prefer) and click on the "OK" button. |
 |
| After calculating all the possible options (it should take a while), Quick Pallet Maker produces the possible floor-loaded box configurations (182 boxes and 546 container loads). Note that the calculation process can be stopped by pressing "Escape" on Windows machines or "Command+Period" on a Mac. |
 |
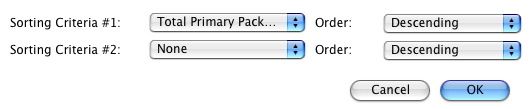
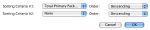
| Although the application had already ordered the container loads by primary packages per pallet in decreasing order, we repeat the exercise for educational purposes. After selecting "Power Sort..." from the Tools menu, we see a small window in which we can select the ordering criteria. |
 |
| Since they had already been ordered, the result doesn't change much, as can be seen in the screenshot at right. |
|
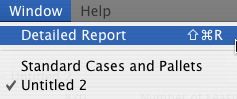
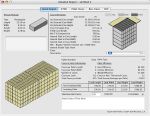
| Given that we have already selected the best result for fitting packages into containers independently of the case count but with some consideration towards the people who load the boxes into the containers (i.e. not exceeding the weight they can carry), we can select "Detailed Report" from the Window menu as in the screenshot at right. |
 |
| The final report can then be saved or exported in a graphics format to send to the packers and unpackers. |
 |
| Top |
|
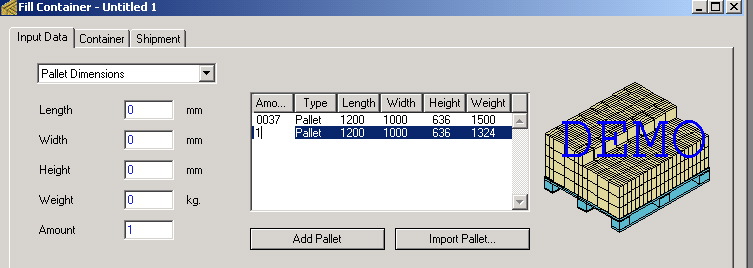
Creating shipments without knowing case count and with a finite number of packages
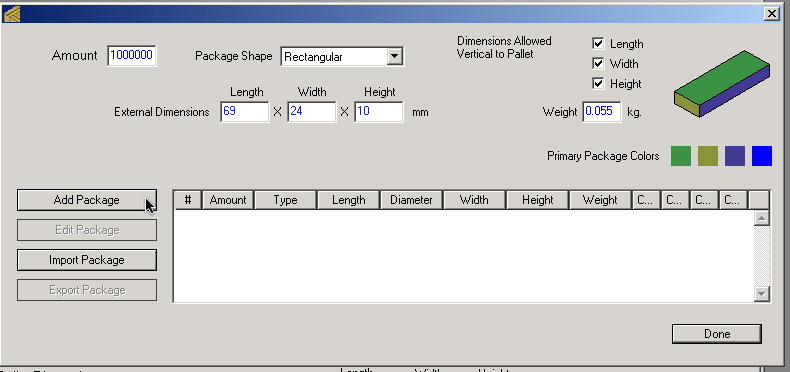
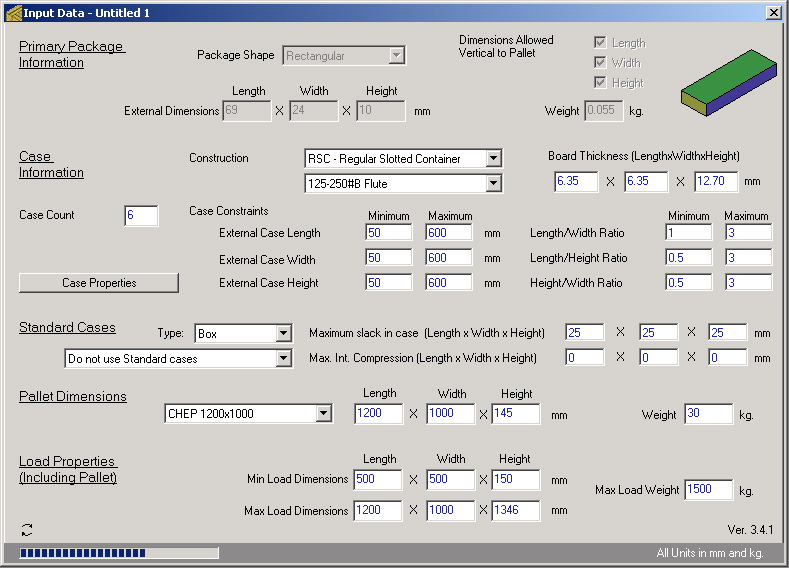
| In the following example, the user has a primary package with the following dimensions: 69 mm x 24 mm x 10 mm and needs to ship one million (1,000,000) of them in a 40' container. Each one of the products weighs 0.055 kg. |
| The first step for solving this problem is to open a new window starting from Primary Package dimensions. |
 |
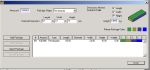
| Next, we open the "Load Multiple Packages" window so that we can set a finite amount of packages for the given shipment. |
 |
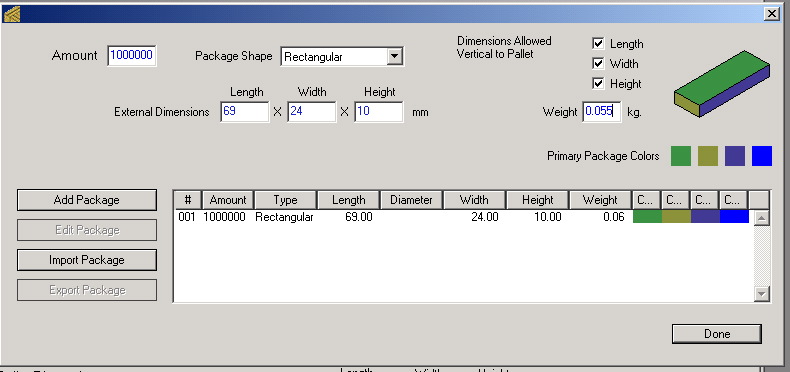
| In this window, we will enter the dimensions and the amount of packages we will use and then click on "Add Package" button to include it in the list. |
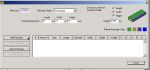 |
| Once the package has been added to the list, we will click on "Done". |
 |
| The primary package input window should appear with the top part greyed out as in the screenshot below. In this example, we will leave the default pallet and load dimensions, along with the box restrictions. Since no case count was specified, we will calculate the optimal count for this example. |
 |
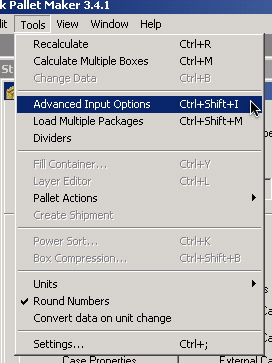
| The next part is to open the Advanced Input Options window. |
 |
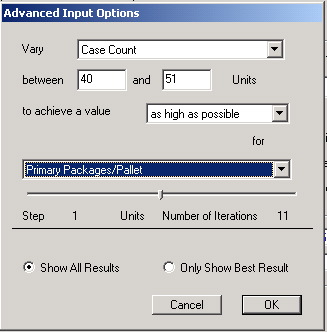
| And enter the data. In this case, we will vary the case count from 40 to 50 packs because we figured lower case counts wouldn't be very efficient and higher case counts would make the example longer. We want to order the results automatically by primary packages per pallet. |
 |
| When we're done, we click on the "OK" button and the calculation commences. The time it takes will depend on your computer's speed. |
 |
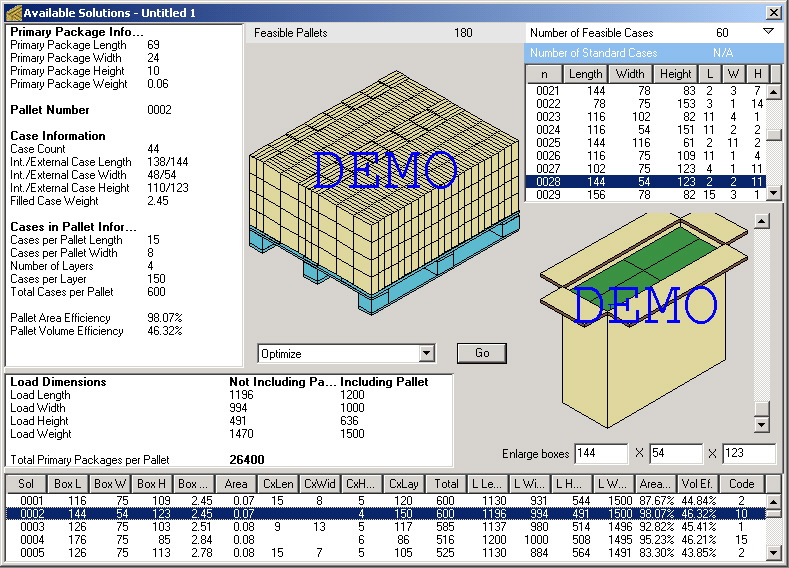
| When we obtain the list of pallets, we pick the second one because it ships the same amount of packs as the first (26,400) but it has a great area efficiency (and thus, greater stability). |
 |
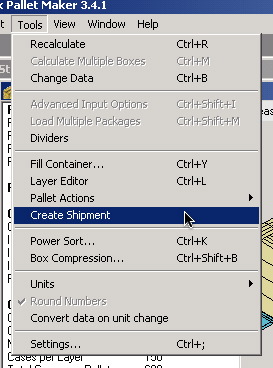
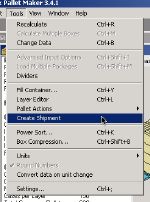
| The next step is to select the "Create Shipment" command from the Tools menu. |
 |
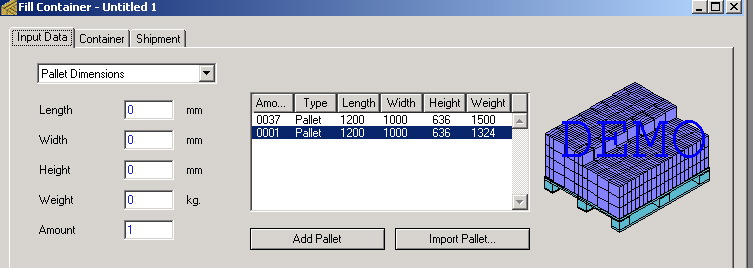
| What QPM did was to copy the resulting pallet as many times as possible to fill the amount of packages (1,000,000) that we wanted to ship. In this case, we obtained 37 full pallets and 1 incomplete pallet (see screenshot). |
 |
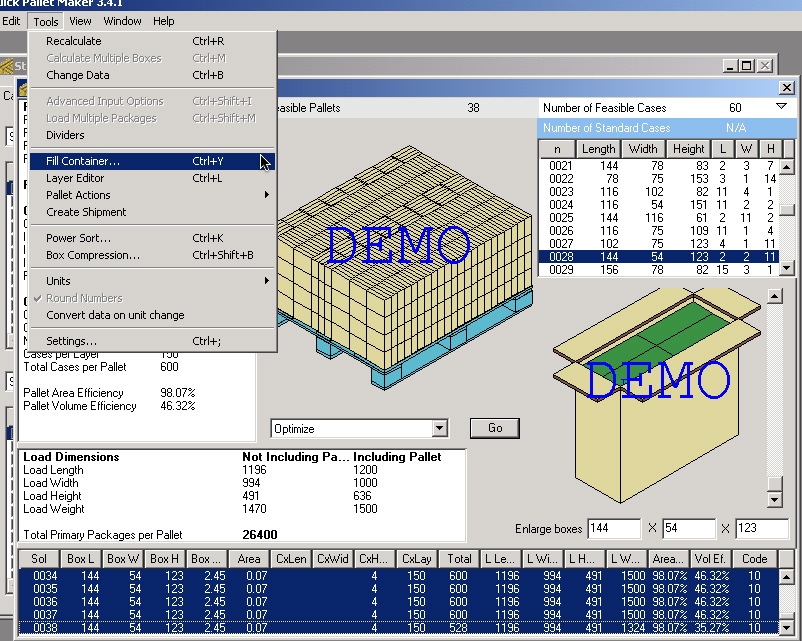
| The next step is to select all the pallets (including the incomplete on) and then "Fill Container". We will see a new window in which we have the 38 pallets in a list. |
 |
| We select the first 37 pallets (i.e. all except the incomplete pallet) and click on the right button (ctrl+click on a Mac) on the table to group them. |
 |
| Then we double-click on the amount cell in the incomplete pallet to change the amount to 1. |
 |
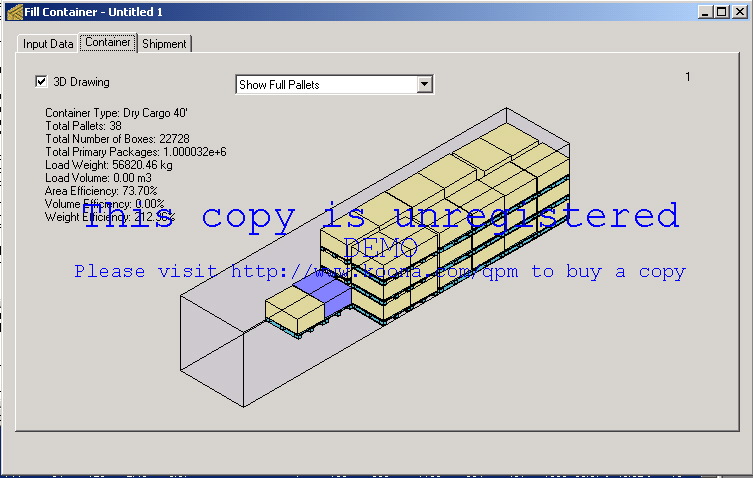
| We also change the color of the incomplete pallet and change the container to 40' before calculating. |
 |
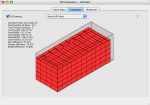
| Finally, we click on the second tab of the Container Fill window and see how 1,000,032 objects fit into a 40' container. |
 |
| Top |
|
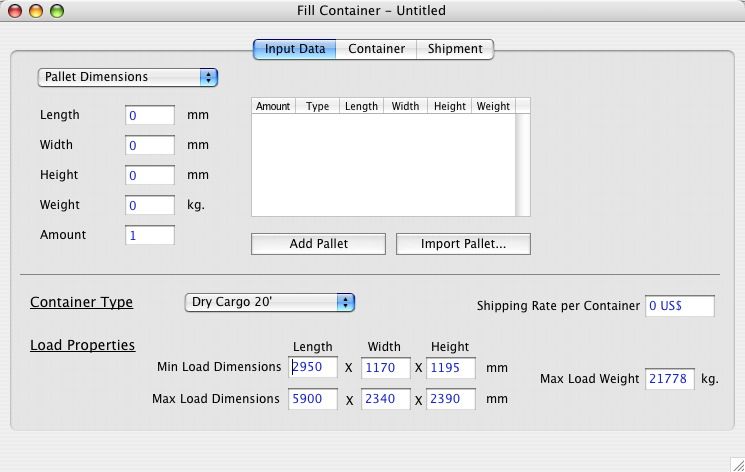
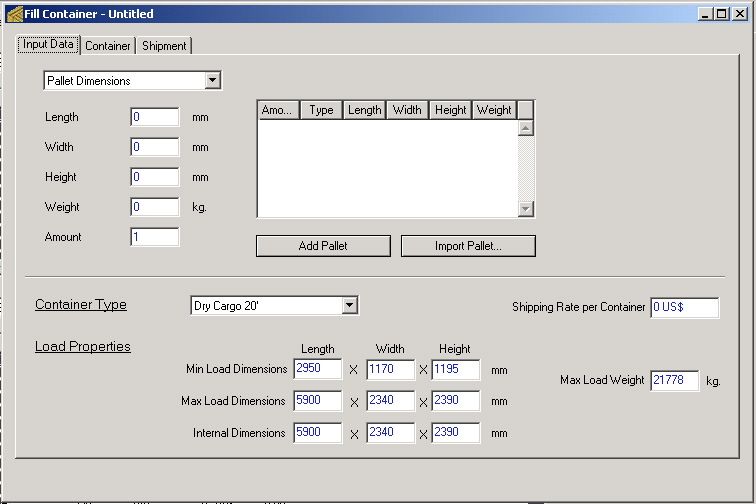
Mixing pallets, drums and boxes in a container
| Although this example is quite simple, it illustrates the new container fill features in Quick Pallet Maker in which we can combine elements with different shapes, counts and size to optimize the filling of a shipping container. The first step is to run QPM and open a new Fill Container window. |
 |
| Once this has been done, we will see a Container Fill window with the default values. |
 |
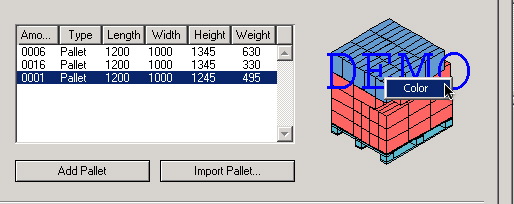
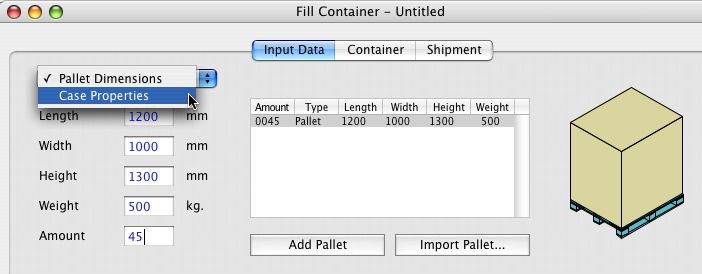
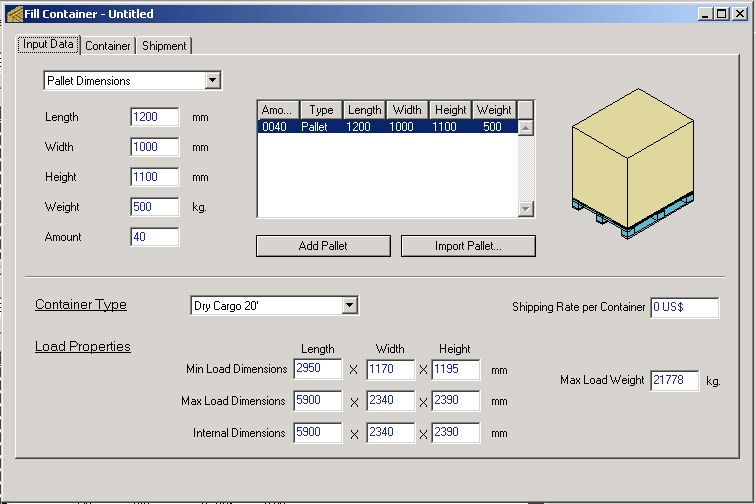
| The first element we will create is a 1200x1000x1300mm pallet that weighs 500 kg. We want to ship 45 of those pallets. Since we want to unload those pallets last, we will add them first to the list. To do this, we fill up the information in the left side of the window and click on the "Add Pallet" button. |
 |
| Next, we will look for a box file that we have saved that represents a "Salvage Drum" which measures 690mm in diameter and 1016mm in height. This file can be downloaded here. To import this drum/box, first we select "Case Properties" from the pull-down menu in the top-left section of the window. |
 |
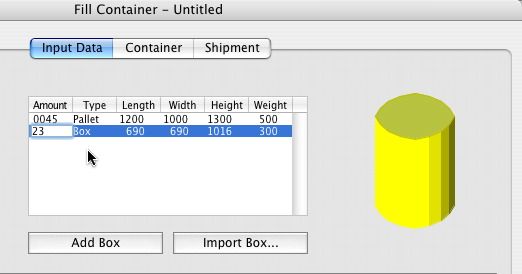
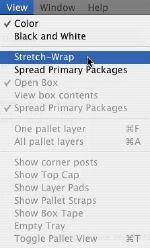
| After selecting "Case Properties, we will see that the "Import Pallet..." button now says "Import Box...". We click on that button to open a dialog window that will allow us to look for the file in a computer or network. Once that is done, we will need to select "Stretch-Wrap" view from the View menu in order to see the cylinder in the drawing at right. |
 |
| The next step is to select the drum in the elements table and change its count to 23 drums. This can be done by double-clicking on the amount cell in the table. |
 |
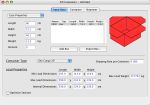
| We will add another box by entering the dimensions in the cells in the left part of the window. The dimensions for this box are 400x200x300mm, it's weight is 10 kg and the amount is 251 units. Once the data has been entered, we click on the "Add Box" button and it is added to the list. |
 |
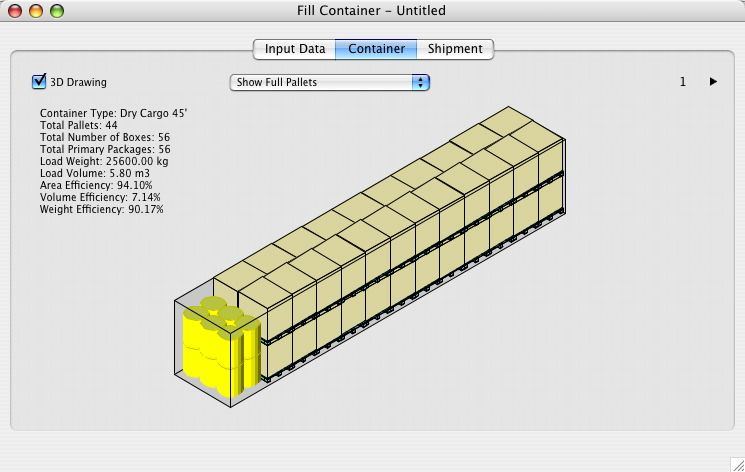
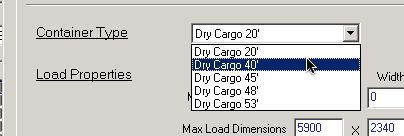
| The last step before calculating is to select the container type. Please note that the dimensions and weight restrictions of the standard shipping containers can be edited in the second tab of the standard cases and pallets window. For this example, we will select the 45 foot container from the pull-down menu and the rest of the dimensions will be updated automatically. Then, we select "Recalculate" from the Tools menu or click on the second tab of the Container Fill window. |
 |
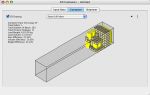
| After the calculation period (will vary depending on your computer speed), we will see the first of the containers in the load. Note the pallets and the drums. |
 |
| Clicking on the right arrow on top of the drawing will reveal the second container. Note that this container has more space available and that all boxes, drums and the extra pallet have been pushed towards the back. |
 |
| Top |
|
Stabilizing Container Loads
| This interesting problem arises from a real case. A customer needs to transport four different types of products by land. These products are color-coded and need to be moved in a 45' container. In any case that the container is bigger than the load, there is nothing else to fill the container with. |
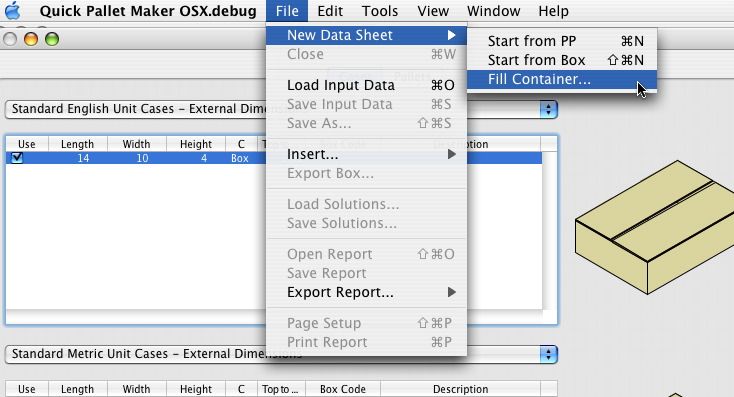
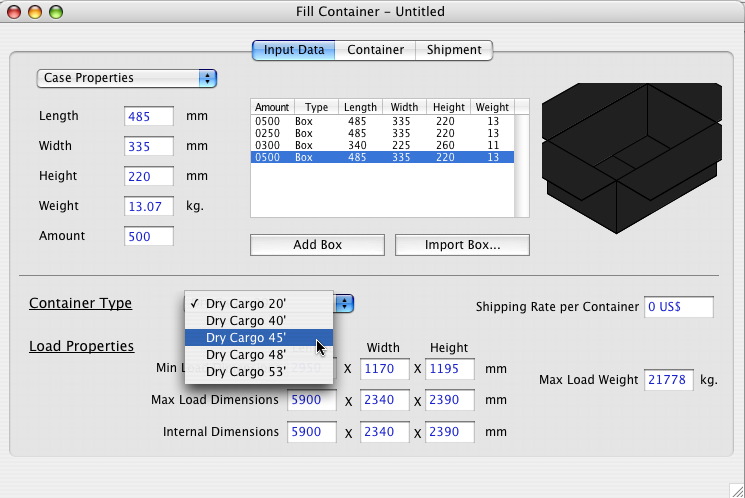
| The first step is to run QPM and open a new Container Fill window by choosing the appropriate command from the File menu. A new window will appear as in the screenshot at right. |
 |
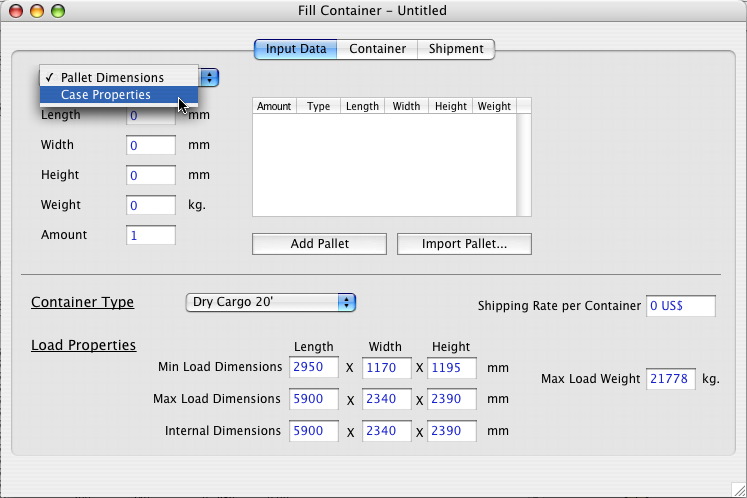
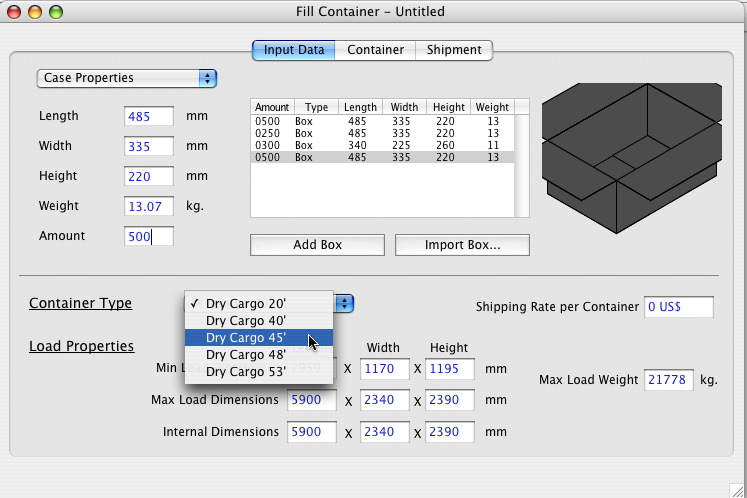
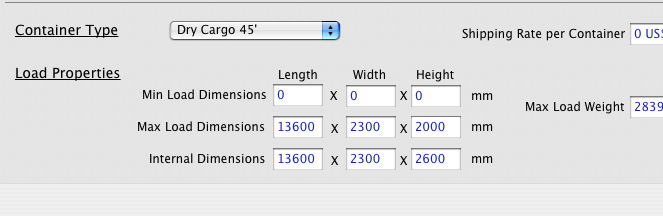
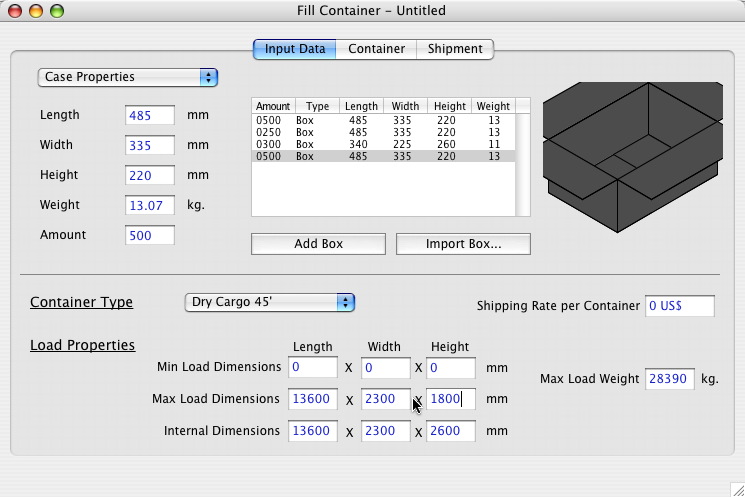
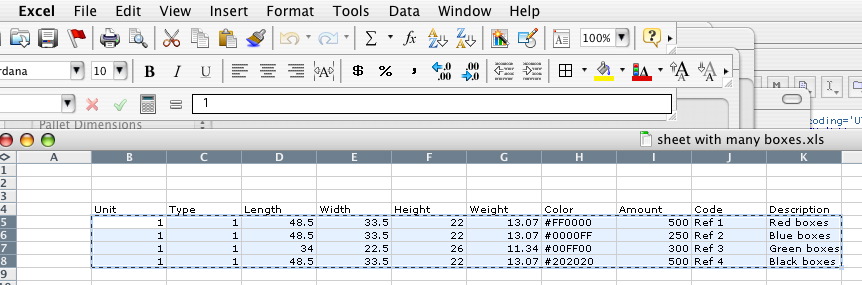
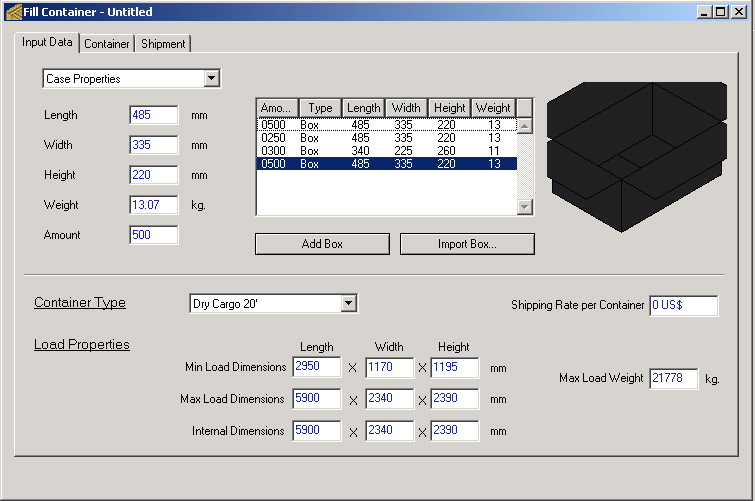
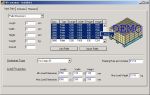
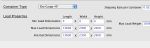
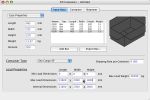
Since we will be introducing the case dimensions manually, we select "Case Properties" from the pull-down menu at the top-left corner of the Container Fill window. The case specifications are the following:
- 500 red boxes that measure 485x335x220mm and weigh 13.07kg
- 250 blue boxes that measure 485x335x220mm and weigh 13.07kg
- 300 green boxes that measure 340x225x260mm and weigh 11.34kg
- 500 black boxes that measure 485x335x220mm and weigh 13.07kg
|
 |
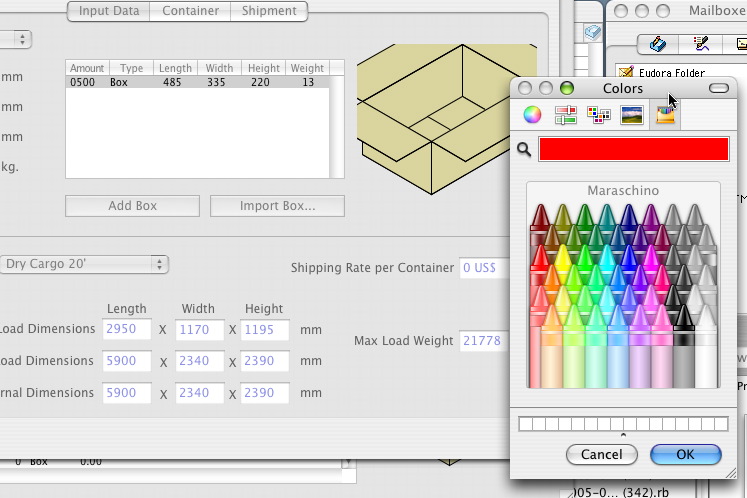
| Every time we add a box (by clicking on the "Add Box" button), we change the color of the box by clicking on the box drawing with the right mouse button (Windows and multi-button mice on Mac OSX) or ctrl+click (one-button Mac). |
 |
| This action reveals a color palette that will change depending on your operating system. From this palette, we can select a color. |
 |
| Once all boxes have been added, we change the container type to 45' container. The container restrictions change automatically. |
 |
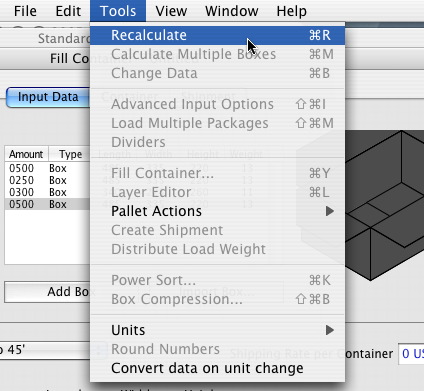
| With the data in place, we select "Recalculate" from the Tools menu or click on the second tab in the window. |
 |
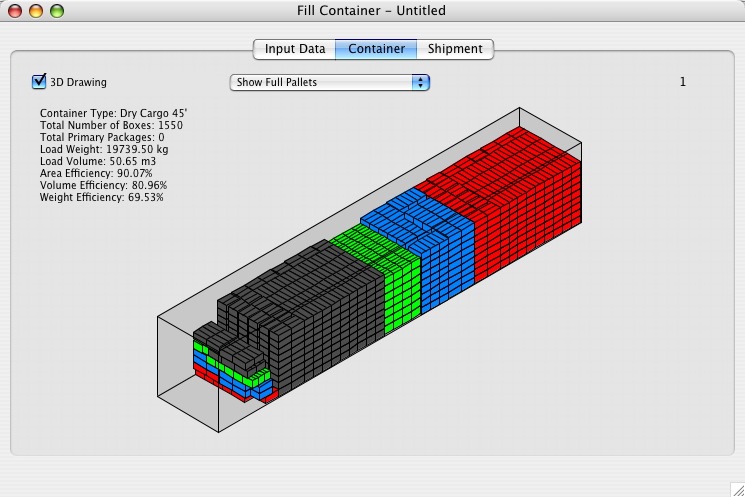
| After a certain period of time, Quick Pallet Maker will show the resulting container load. If we check the drawing at right, we will notice that the container has been optimized in such a way that the boxes are placed against the back of the container. This is excellent if we would like to add more items to the container. However, the client has mentioned that she will only ship those boxes (and none other). Hence, the resulting load needs to be optimized for road transport. In its current state, too much pressure is being applied to the back trailer wheels. |
 |
| The first alternative that is available in QPM is to simply center the load. This method calculates the load center of gravity and places it in such a way that it will exert the most downward force in the container center. To do this, we select "Distribute Load Weight" from the Tools menu. |
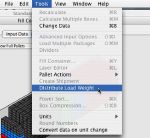 |
| The resulting container will have the same load configuration but centered. This load is good for transport but the client is still not satisfied because the boxes could topple if the truck hits potholes or other bumps on the road. |
 |
| Hence, we go back to the "Input Data" tab and change the maximum load height to a lower value. In this case, we will use 2000mm (a guess) instead of the previous 2600mm. |
 |
| After selecting "Recalculate" again, we can see that the load is better distributed on the floor of the container. However, we can still check a lower allowable height. |
 |
| We go back to the input tab and choose 1800mm instead. |
 |
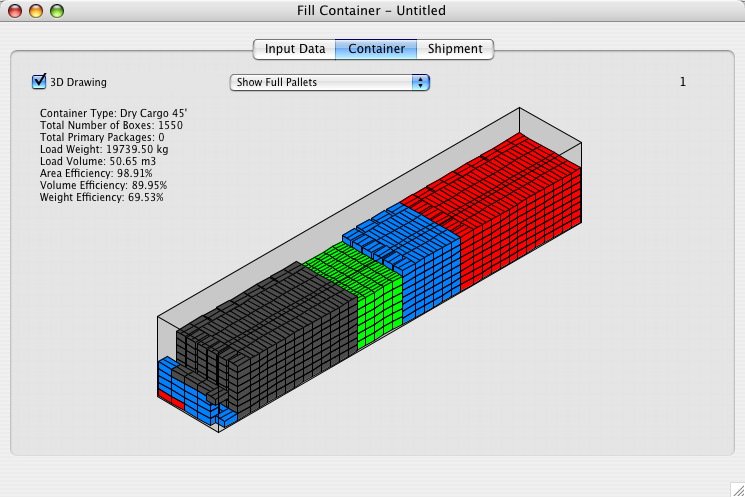
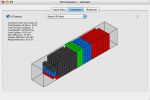
| After recalculating, we can see that we have obtained a very well distributed load that uses up most of the container floor (Area Efficiency > 98%). Note that if we would have used a lower height, we would have needed another container. |
 |
| Top |
|
Picking the Right Container Type
| This is another simple example. A customer that is very new to road transport needs to move 40 pallets from one location to another in a trailer truck. He calls up a transportation company and it quotes him a price for the full trip and offers different container sizes. All else equal, the bigger the size, the higher the cost. The transportation company justifies this by indicating that longer trailers are harder to drive around. |
| We will use Quick Pallet Maker to choose the best container size and reduce the transportation costs as much as possible. The first step is to run QPM and open a new Container Fill window from the File menu. |
 |
| The next step is to introduce the pallet dimensions. IN this case, the pallet measures 1200x1000x1100 mm and weighs 500 kg. We have 40 pallets to ship. |
 |
| Leaving the default container dimensions and the selection of the 20' container, we select "Recalculate" from the Tools menu. |
 |
| This will calculate how many 20' containers we would need to ship the 40 pallets. If we click on the right arrow at the top-right section of the window, we will see the second container that is also full of pallets. |
 |
| Note that when the second container (number 2) is shown, the right arrow is gone and a left arrow appears. Clicking on it would reveal the first container. |
 |
| Since we would need to pay for two trips to ship the 40 pallets in 20' containers, we will want to check how these pallets fit in the larger containers. For this, we click on the "Input" tab or use the "Change Data" command from the Tools menu to see the Input Data tab. Once there, we select the 40' container and Recalculate again. |
 |
| This time, the full load fits in only one 40' container. This is essentially the best solution for the customer as only one trip is made and the cost for the 40' container is less than for the longer containers. |
 |
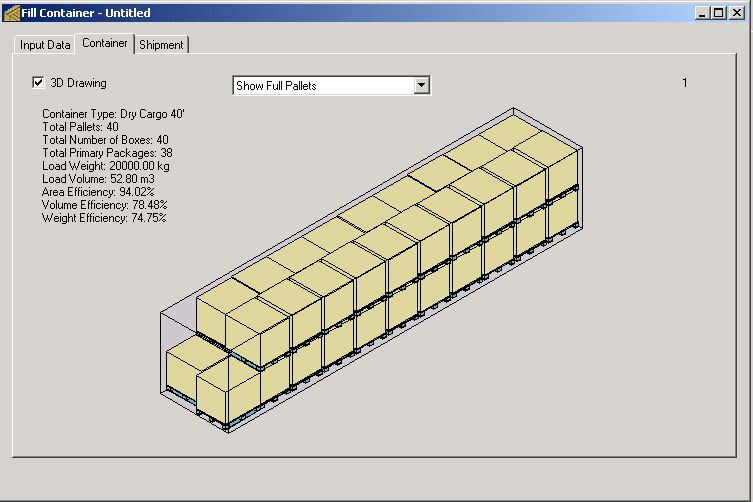
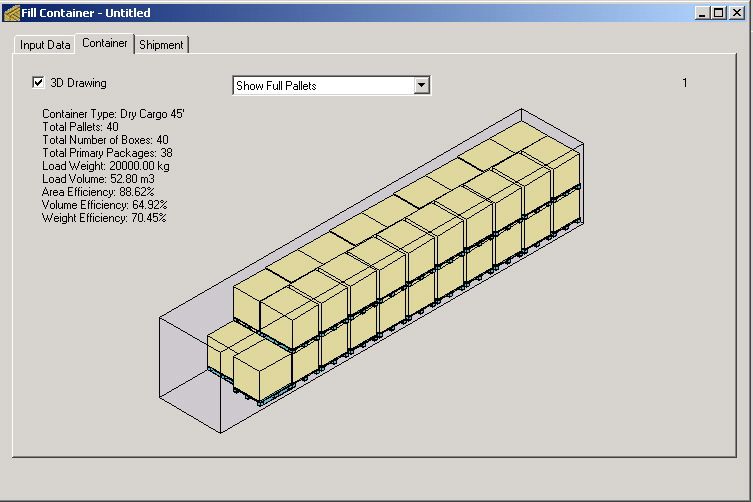
| However, just for reference, we can go back and select the 45' container to see that in effect, space is wasted unnecessarily. |
 |
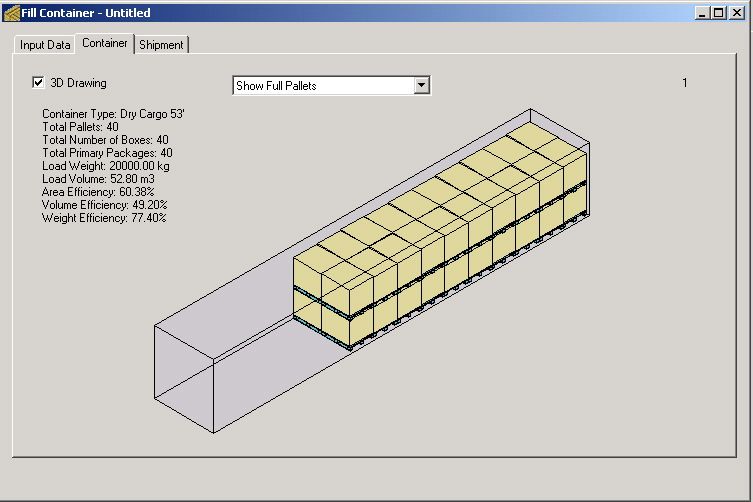
| Same for the 48' container (note the lower volume efficiency). |
 |
| Even worse for the 53' container. Hence, the customer asks for the shipment to be made in a 40' container. |
 |
| Top |
|
Pasting Box and Pallet Data
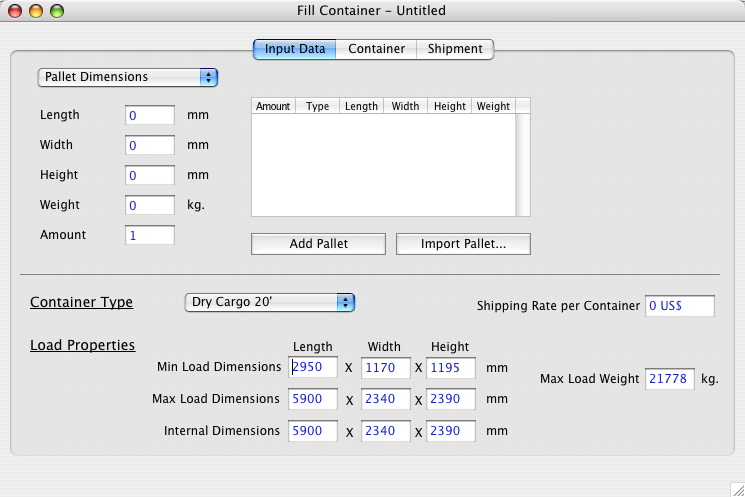
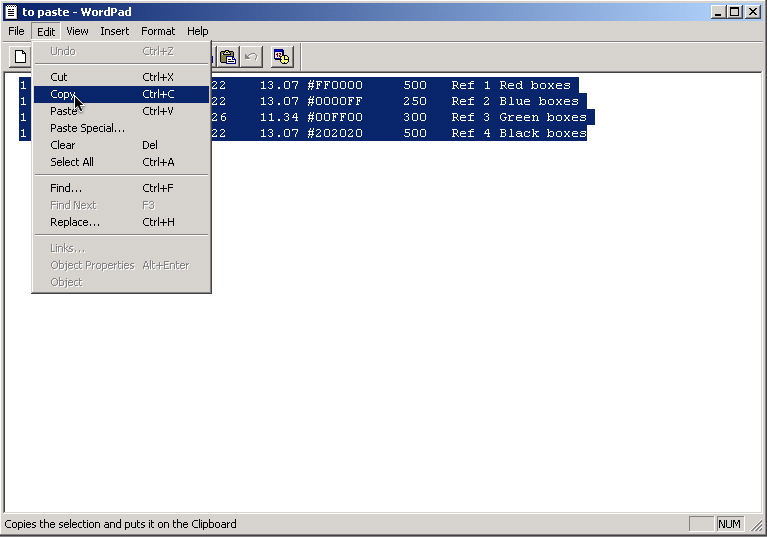
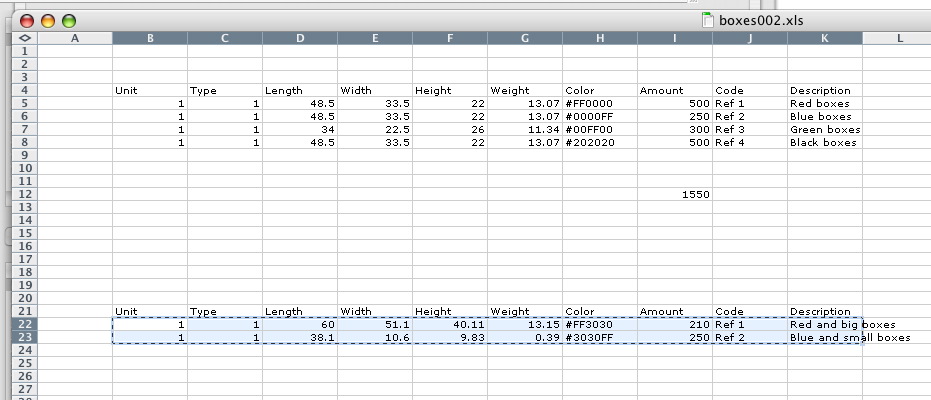
| The previous example can be run in a quicker way by pasting the box data directly on top of the Container Fill window. The first step is to open the Container Fill window. If it was already open, then the first step is to clear the boxes or pallets from the main list. The MS Excel file that is shown in this example can be downloaded by clicking here. |
 |
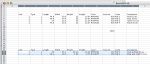
| The next step is to copy the text from a spreadsheet. Note that the conditions for the copied text are the following: it must be separated by tabs and the column order must be Unit (0 = mm/kg, 1 = cm/kg, 2 = inches/lbs), Type (0 = pallet, 1 = box), Length, Width, Height, Weight, Color ("web" format or #RRGGBB), Amount, Code and Description. Note that the last two are optional. |
 |
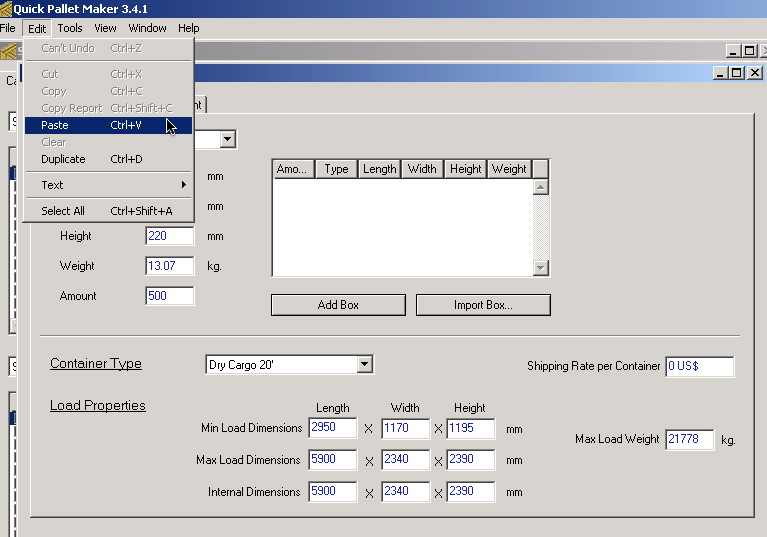
| Once the data is copied, we paste it by selecting "Paste" from the Edit menu. Then, we choose the same container as in the previous example. |
 |
| After using the "Recalculate" command from the Tools menu, we should see the same results as in the previous example. |
 |
| The advantage to copying and pasting from a spreadsheet is that the code and description of the boxes is already included in the shipment list that can be exported to another spreadsheet file. |
 |
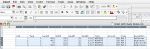
| To run this example, you do not need to have a spreadsheet program. You can use any text editor and enter the data separated by columns as shown in the screenshot at right. |
 |
| The data is pasted in the same way. |
 |
| Pasting the data will deliver the same result. |
 |
| Top |
|
Calculating Shipping Cost
| The purpose of this example is to show how QPM can be used for calculating shipping costs. In this case, a diaper manufacturer wants to pack diaper bags in counts of 6 into boxes and then into pallets and containers. |
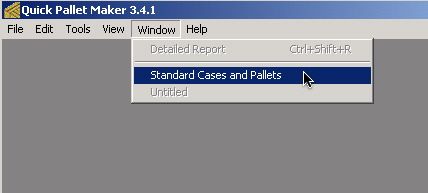
| The first step in this example is to check the default container data that is stored in the QPM preferences. To do this, select "Standard Cases and Pallets window" from the Window menu. |
 |
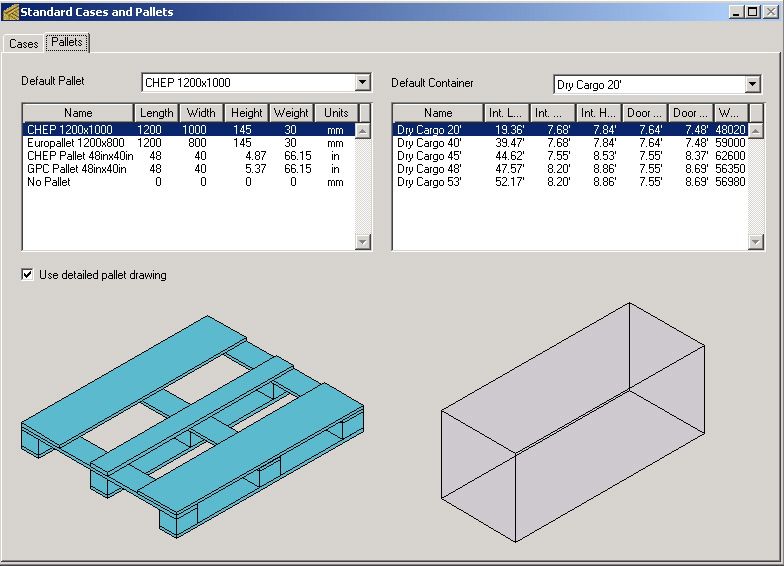
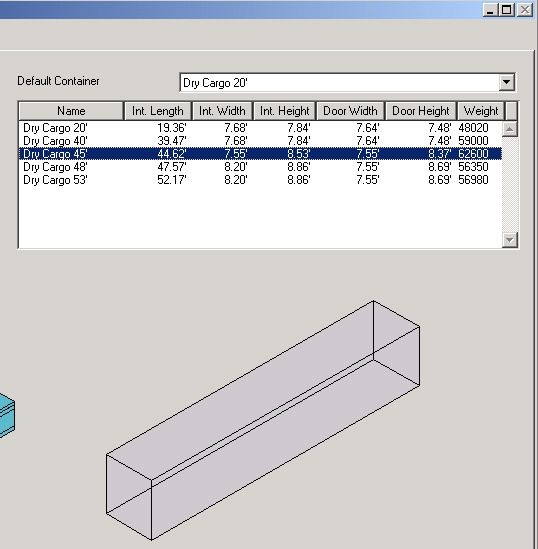
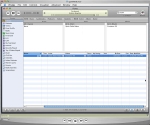
| A window will show up that has two tabs. Clicking on the second tab reveals the saved standard pallets and containers. |
 |
| When we scroll through the containers, we can see that the drawing changes. Note that the name, dimensions and weight constraint of the containers can be edited from this window. Also note that the dimensions are in feet and pounds because we had previously set the default QPM dimensions to inches/lbs. |
 |
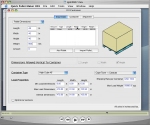
| To calculate a pallet configuration, we will begin by opening a new document window starting from primary package dimensions. This command is available from the File menu. |
 |
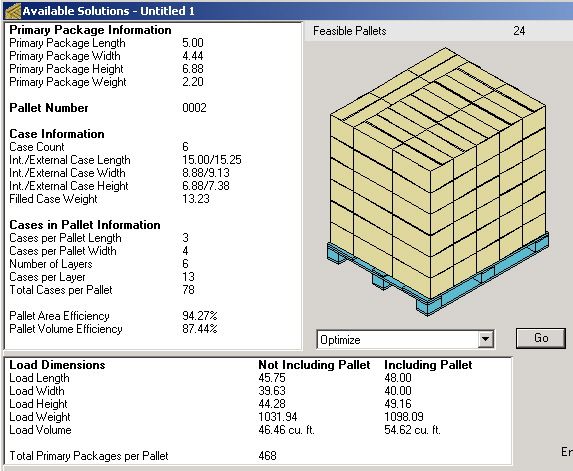
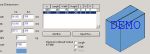
| We will enter the dimensions as in the screenshot at right. For simplicity, we have chosen the default dimensions and changed the pallet to a 48x40 CHEP pallet. |
 |
| After selecting "Recalculate" from the Tools menu, we will see a list of different pallet solutions. |
 |
| To sort the solutions, we use the "Power Sort" feature that is available from the Tools menu. The criteria we set is Primary Packages per Pallet in descending order. |
 |
| After clicking "OK", we will see the reordered list and select the topmost pallet. With the pallet selected, we choose "Fill Container..." from the Tools menu. |
 |
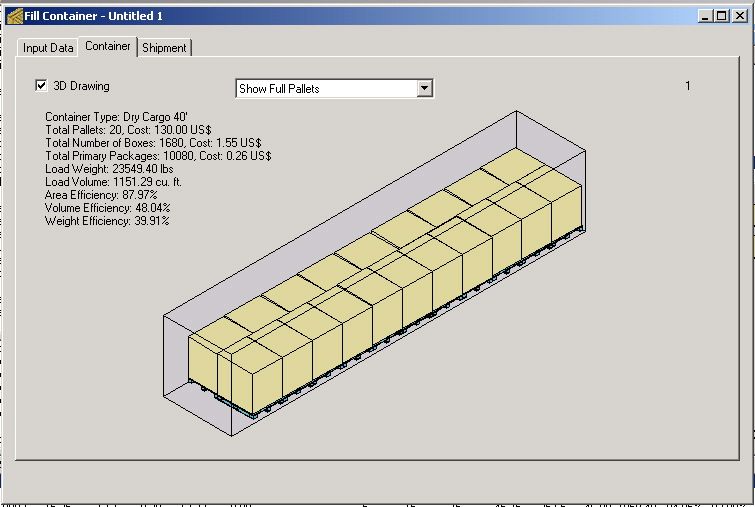
| This command will open a new window from which we select the pallet to reveal its drawing. The shipping company charges US$ 2600 for a given distance with a 40' container and US$ 2800 using a 45' container. First, we select the 40' container from the menu and enter the shipping cost per container. |
 |
| After selecting "Recalculate" from the Tools menu, we will see that the 40' container has been filled very inefficiently, making the cost per package a high 0.26$ per pack. |
 |
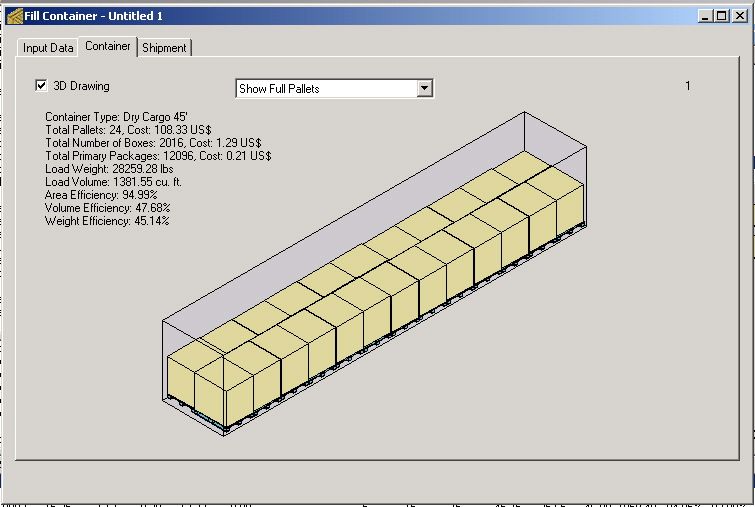
| If we go back and change the container type to 45', we will see that there is only one row of pallets per container and that the cost is still high. The reason for this is that the pallet load is too tall and that we will need to select another pallet arrangement. |
 |
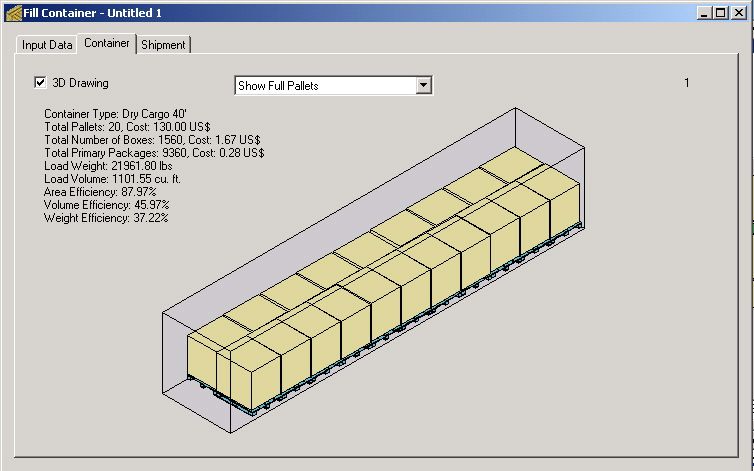
| We close the Container Fill window and choose the second best pallet configuration, which happens to be shorter. |
 |
| When we select the pallet and then "Container Fill" from the Tools menu, we can see the window from which we will select the 40' container and enter the shipping cost. |
 |
| After calculating again, we see that the 40' container is not the best option for this pallet size. |
 |
| We go back to the "Input Data" window and change the container to 45' and enter the higher cost associated to this container for this example. |
 |
| After recalculating, we can see that the packs now cost $0.12 to ship, which is acceptable for the client. |
 |
| Top |
|
Fitting Multiple Boxes Into One Container
| A new feature in QPM 4.0.1 enables the application to fit as many objects it can into one container in an irregular fashion, starting from the first element in the list. This is different from the alternate mechanism in which all elements (pallets and boxes) are fit by order starting from the back and pretty much separated. Hence, this method will cut off the elements that don't fit. |
| The first step is to introduce the data with the box dimensions. The essence of the problem is that the customer needs to first introduce as many "big" boxes as she can and then fill the remaining space with "small" boxes. This is a two-step process: first we need to know how many big boxes fit in a 20' container. To do so, we enter the box dimensions (60x51.1x40.1cm, weight=13.2kg) and use a count of zero. |
 |
| Once we select the "Recalculate" command or click on the second tab, we will see that the resulting container can fit 210 big red boxes. |
 |
| The next step is to add the data for the second box and change the amount of red boxes to 210. This can be done by either typing the information directly or copying it from a spreadsheet application (as shown in the screenshot). In any case, we assign a case count of 1000 for the smaller blue boxes. |
 |
| The input window should look like the one in the screenshot to the right. We are trying to fit 210 big red boxes and 1000 of the smaller blue ones (dimensions = 38.1x10.6x9.83, weight = 0.39kg). |
 |
| After selecting "Recalculate" or clicking on the second tab, we can see that the application was able to fit all of the 1210 boxes into the 20' container. However, there's some space left for more boxes. |
 |
| Therefore, we go back to the previous window and increase the number of small boxes to 2000 (an educated guess). |
 |
| When we calculate again, we see that the application was able to fit a total of 1391 boxes (210 big boxes and 1181 small boxes). |
 |
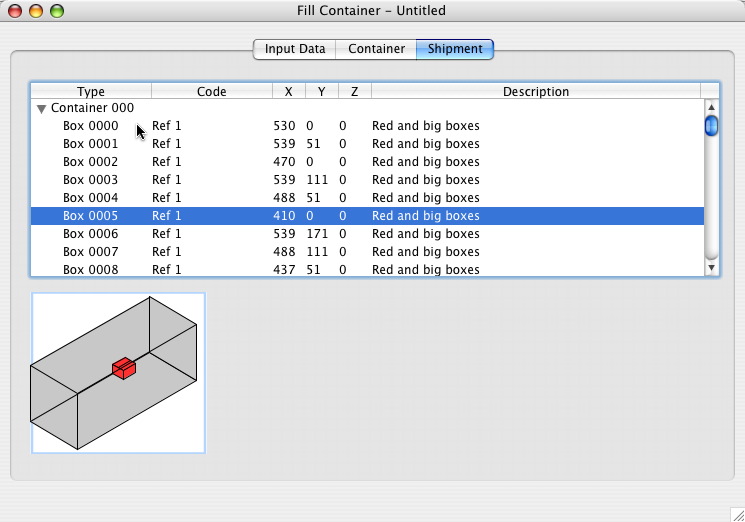
| For better visualization of the container load contents, the user can either export a QuickTime movie by selecting "Export Report - Palletizing Movie" from the File menu or use the third tab of the Container Fill window to visualize the boxes with their description and coordinates, one by one. Note that the code and the description of each box was pasted from the spreadsheet file mentioned previously. |
 |
| Top |
|
Loading Cylinders Onto Pallets Onto Containers
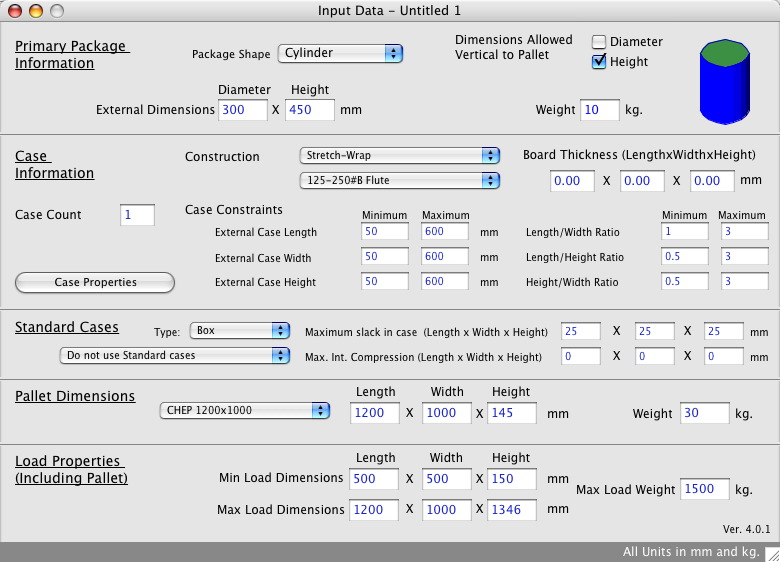
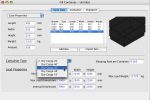
| This example is fairly simple. We will load cylinders onto pallets and then onto containers. First, we start by opening a new window starting from Primary Package dimensions. We choose "Cylinder" as package type, enter the dimensions, choose "1" as the case count and stretch-wrap as the box construction type, which is the equivalent of not using the box at all. |
 |
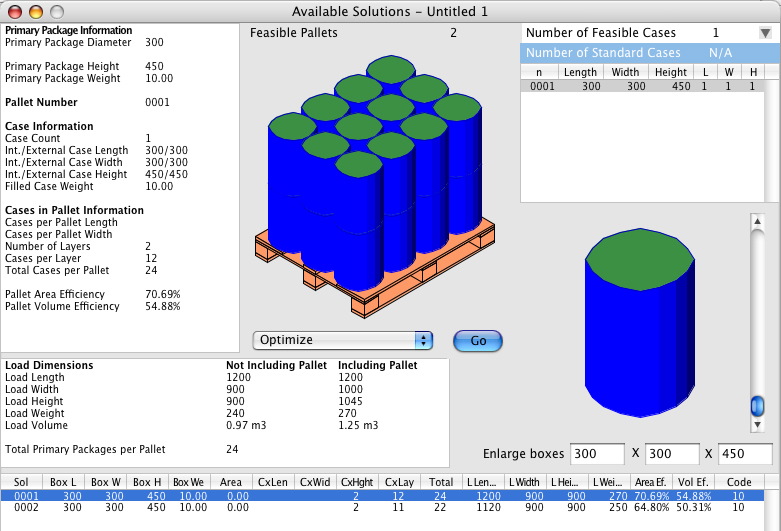
| Once we have the input data in place, we select "Recalculate" from the Tools menu to see the two resulting pallets. |
 |
| We choose the first pallet because the amount of cylinders per pallet was greater than the second one and select "Fill Container" from the Tools menu (not from the File menu) to see the Container Fill window with the pallet in place. For this example, we select the 40' container for filling with cylinders. |
 |
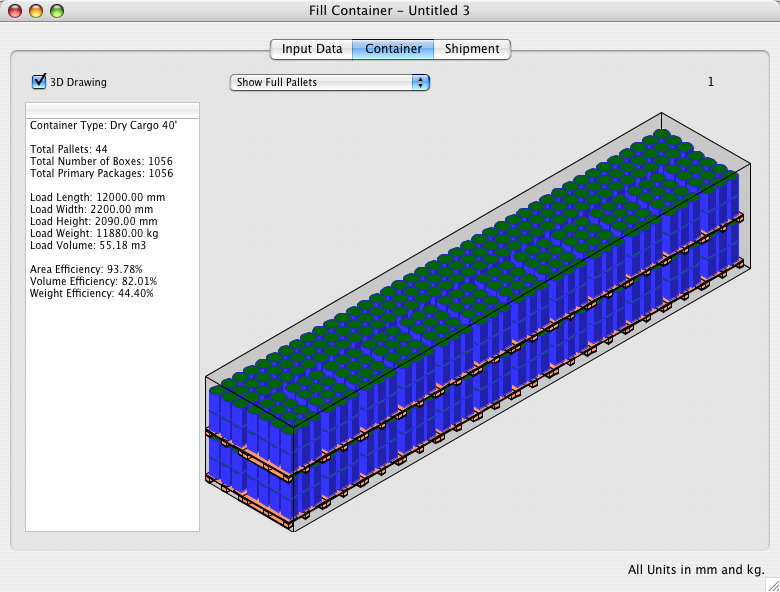
| After selecting "Recalculate" from the Tools menu or clicking on the second tab, we will see the resulting container. |
 |
| This container can be viewed in two dimensions (note that an older but equivalent screenshot was used). |
 |
| Top |
|
Exporting Container Fill Movies to iPodTM
| For those unaware, the Apple iPod is a popular digital music player that can also (in its last iteration) support video playback. Quick Pallet Maker version 4.1 now includes an option for exporting box, pallet and container fill movies to the same size of the iPod screen (320x240 pixels). This is useful for people who work in a shipping dock and want to recall the order of each pallet, box or drum for loading in a specific container. All they would need to do is to carry their iPod with the movies generated by Quick Pallet Maker (yes, no printouts, just a cool music player) to see how everything fits. |
| The first step is to calculate a container fill. You can use any of the examples in this page for reference. Once the container is ready, choose File -> Export -> Container -> Movie (320x240). Note that it works best if "Video" is chosen in the compression settings. The movie to the right (click the drawing) shows how to create a container with boxes and save it to a 320x240 movie. Note that (free) QuickTime needs to be installed prior to running QPM. |
 |
| The next step is to run iTunes to open the recently saved movie file. Before you can sync it with your iPod, you still need to convert it to iTunes by choosing the appropriate option from the "Advanced" menu. Once this has been done. It is a good idea to add some information to the video itself to be able to find it later in the iPod. Once this process has been completed, you can update your iPod and the container movie should be available for viewing. |
 |
| Apple, iTunes and iPod are trademarks of Apple Computer, Inc. |
| Top |
|
Adding Shipping Routes To Containers
| Here's an example on how to use the new Quick Pallet Maker feature that saves the shipping routes with their costs in the Standard Container file. This allows the user to choose a route so that the shipping cost can be updated automatically when a container is selected. In the first part of the movie, we open the Standard Cases, Pallets and Containers window and click on any container to select it. Once the container has been selected, click on the drawing with the right mouse button (Ctrl+click on a Mac) to open a small window. |
 |
| In this window, we will enter the origin, destination and freight cost for this route. For this example, we have chosen a route that starts in Cape Town, South Africa and ends in Caracas, Venezuela. Please don't pay attention to the values themselves as their sole purpose is to serve as an example. |
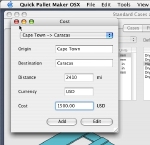 |
| Once we have entered the shipping information, we click OK and move on to the container fill window. Every time the specific container has been selected (in this case, the 40' High Cube), a pull-down menu will appear to provide the user with route options. When an option is selected, the shipping cost appears in the appropriate cell. |
 |
|
| Note in the example that the shipping cost of each pallet or box in the container will not appear until we add a code and/or description to the element that will be shipped. This is why in the example, we first calculate the container, see that there is no cost attached and calculate again. |
| Top |
|
|